iCloud custom domain guide
In this guide I will show the few steps that are needed in order to get your domain up and running.
This feature might be useful if you only handle a personal or a small business domain and could benefit from more centralisation with your existing iCloud Mail (and the web access that comes with it), you also get spam filtering, push notifications on iOS and maildrop for large attachments.
Before you begin you will need a few things:
- A registered domain name and access to the DNS panel
- An iCloud account with an active subscription (then go to iCloud Beta website)
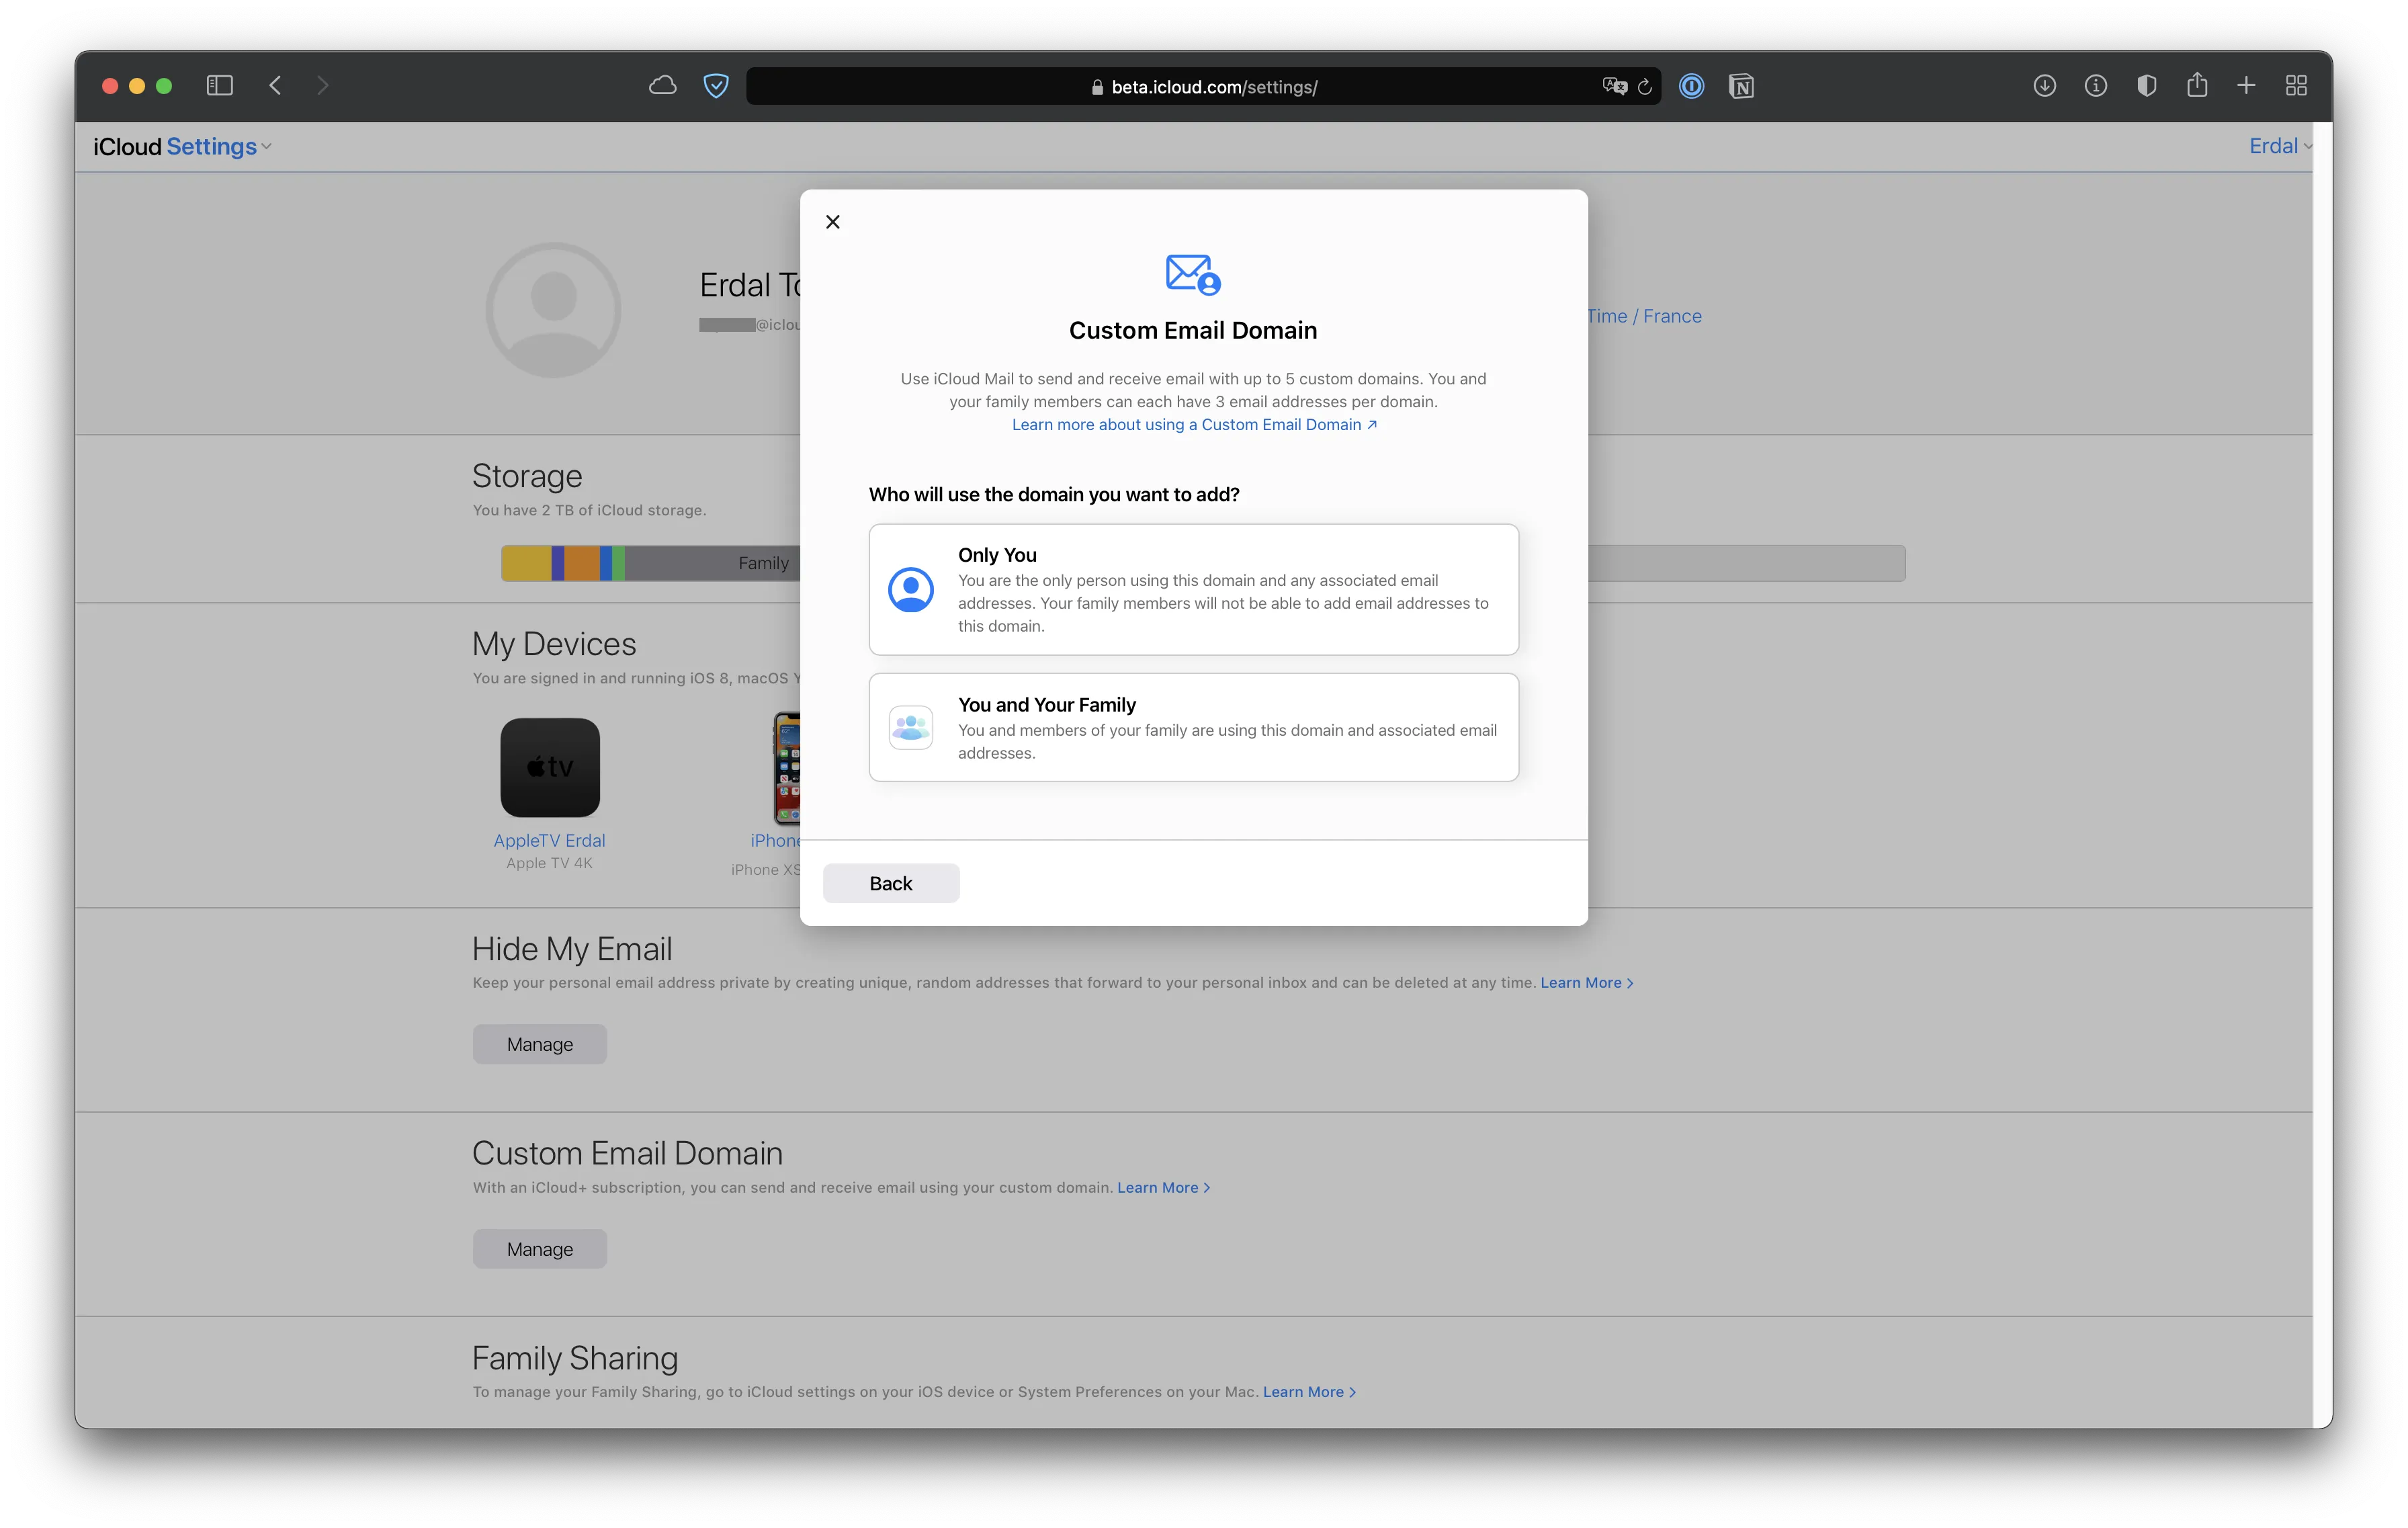
Once on the webpage you can choose to share that domain with your family (as part of the family sharing program) or to only you.
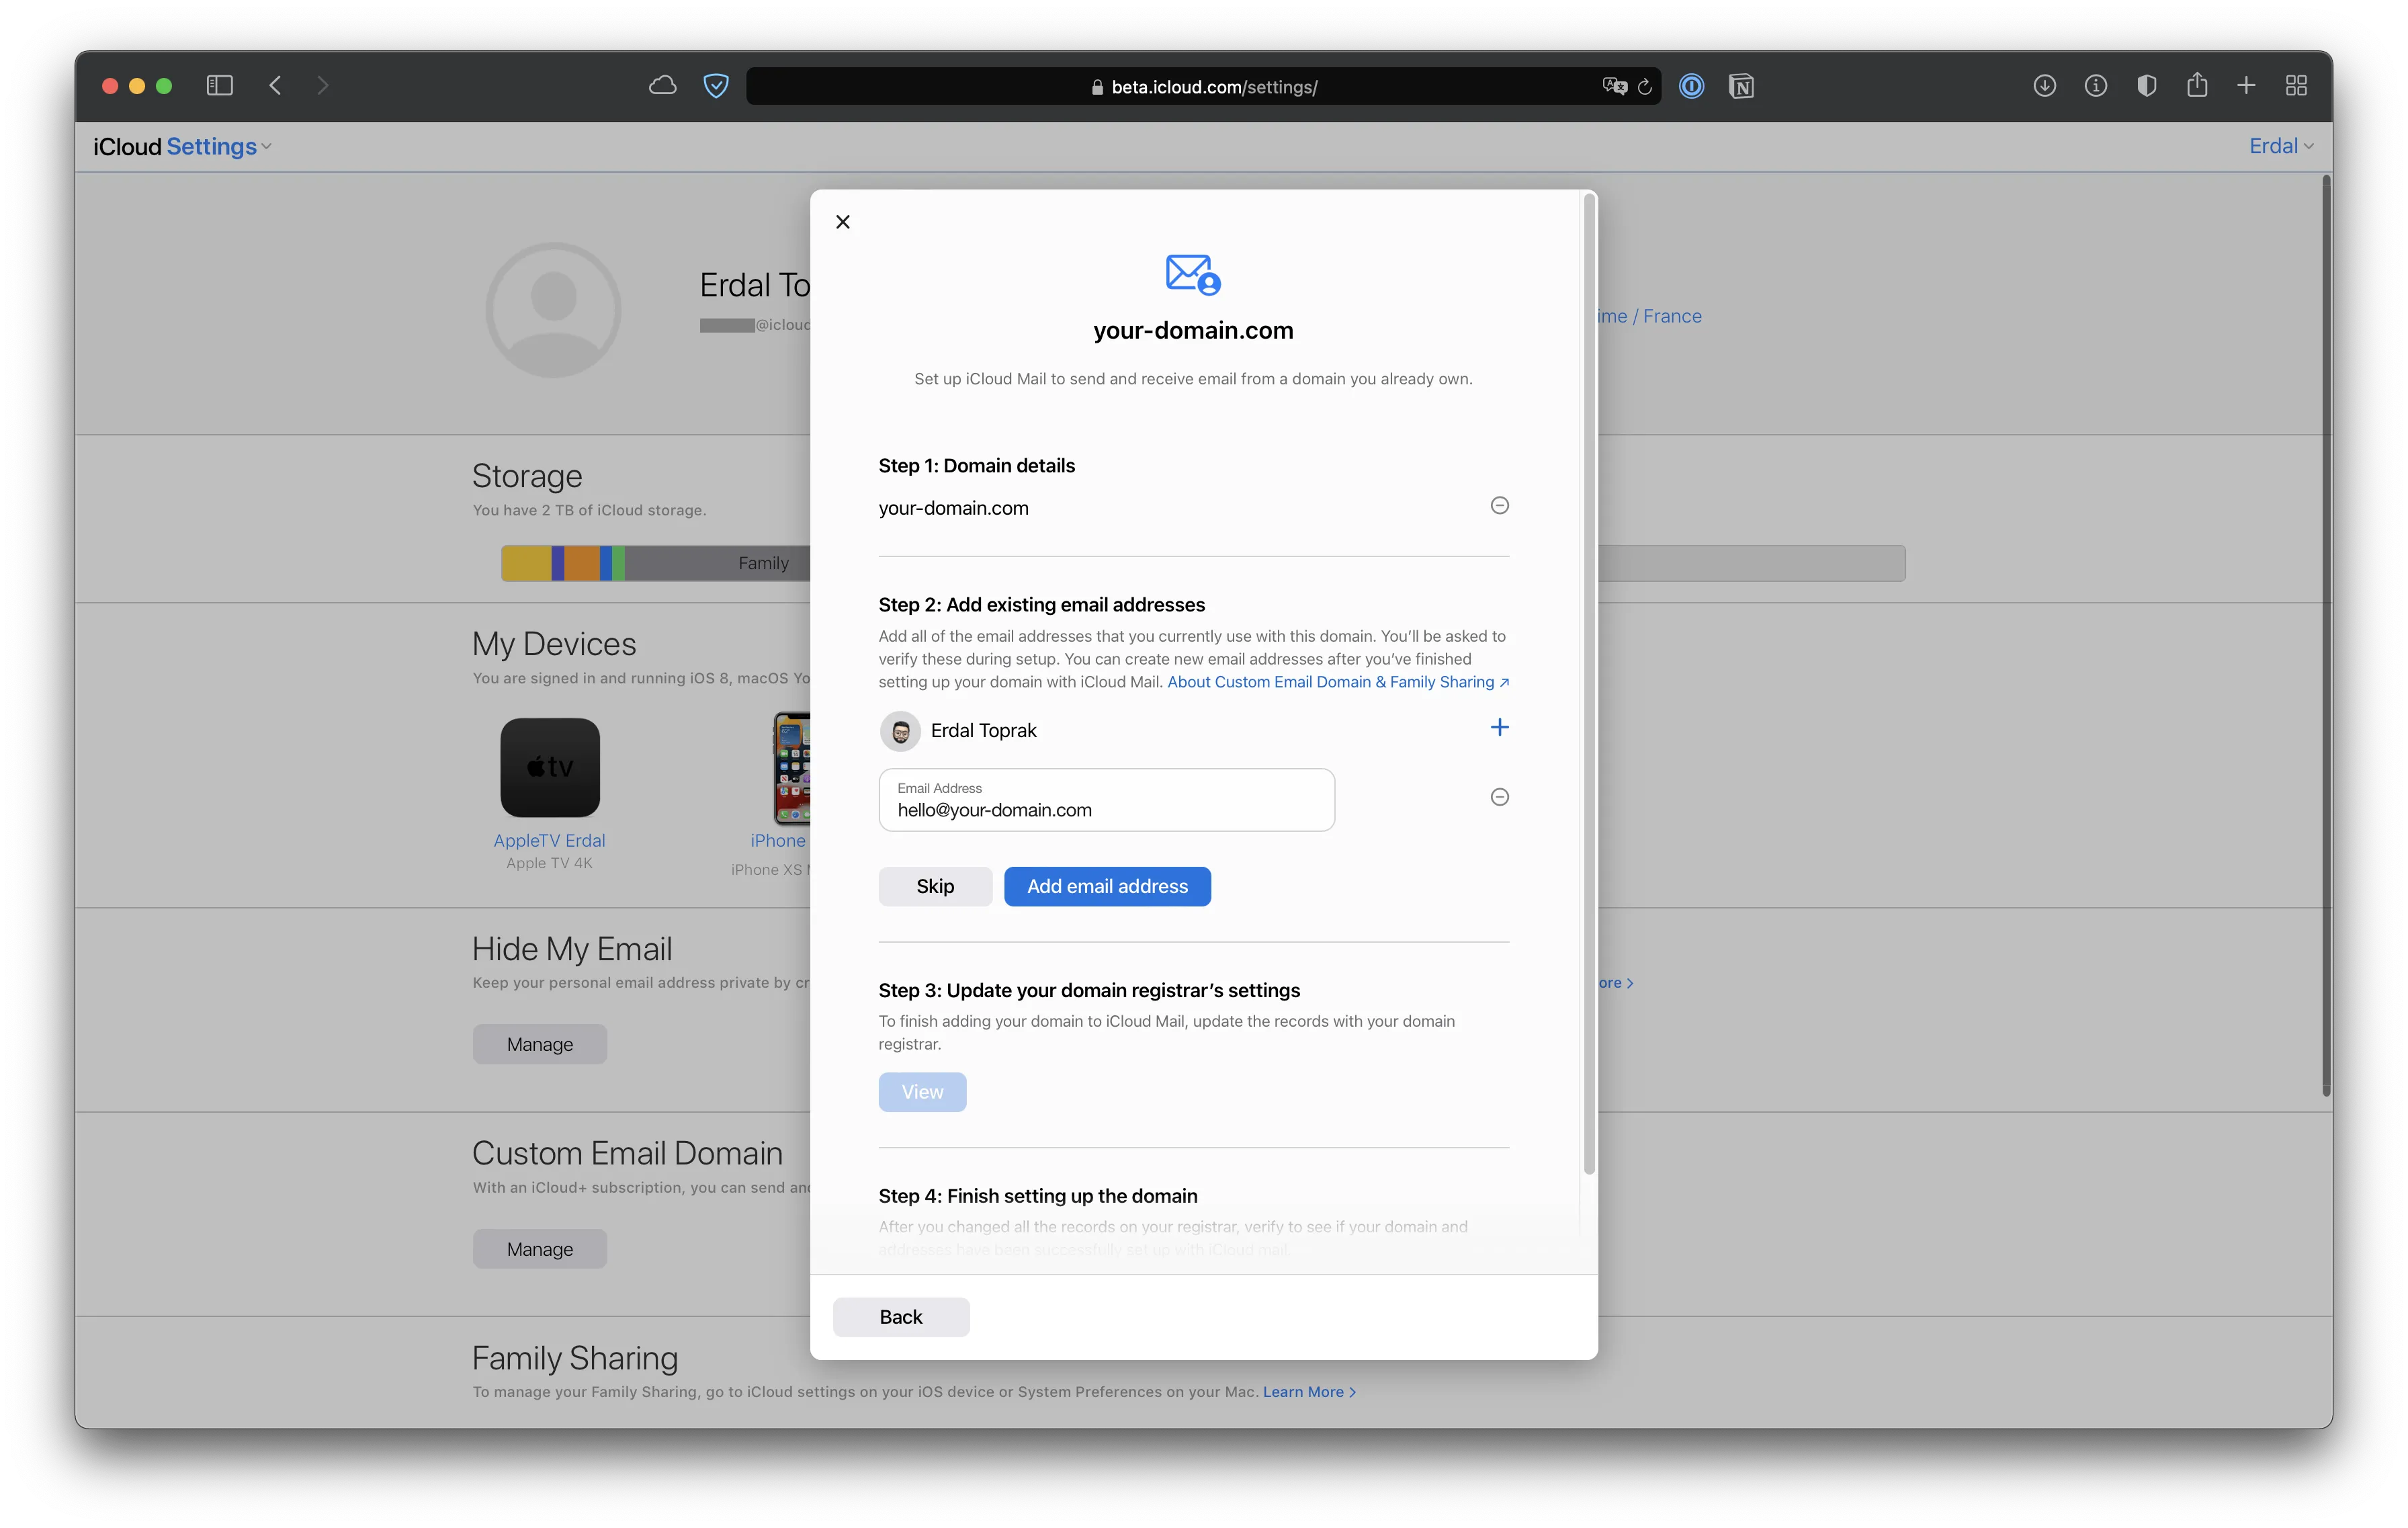
Once you enter your domain you can immediately add the existing addresses to keep continuity with your current ones (and also add more later). Once this is done you will need to add some records on your DNS panel. (Note: Do not remove any DNS records before this step as you need to click on the verification link to each of your email accounts)
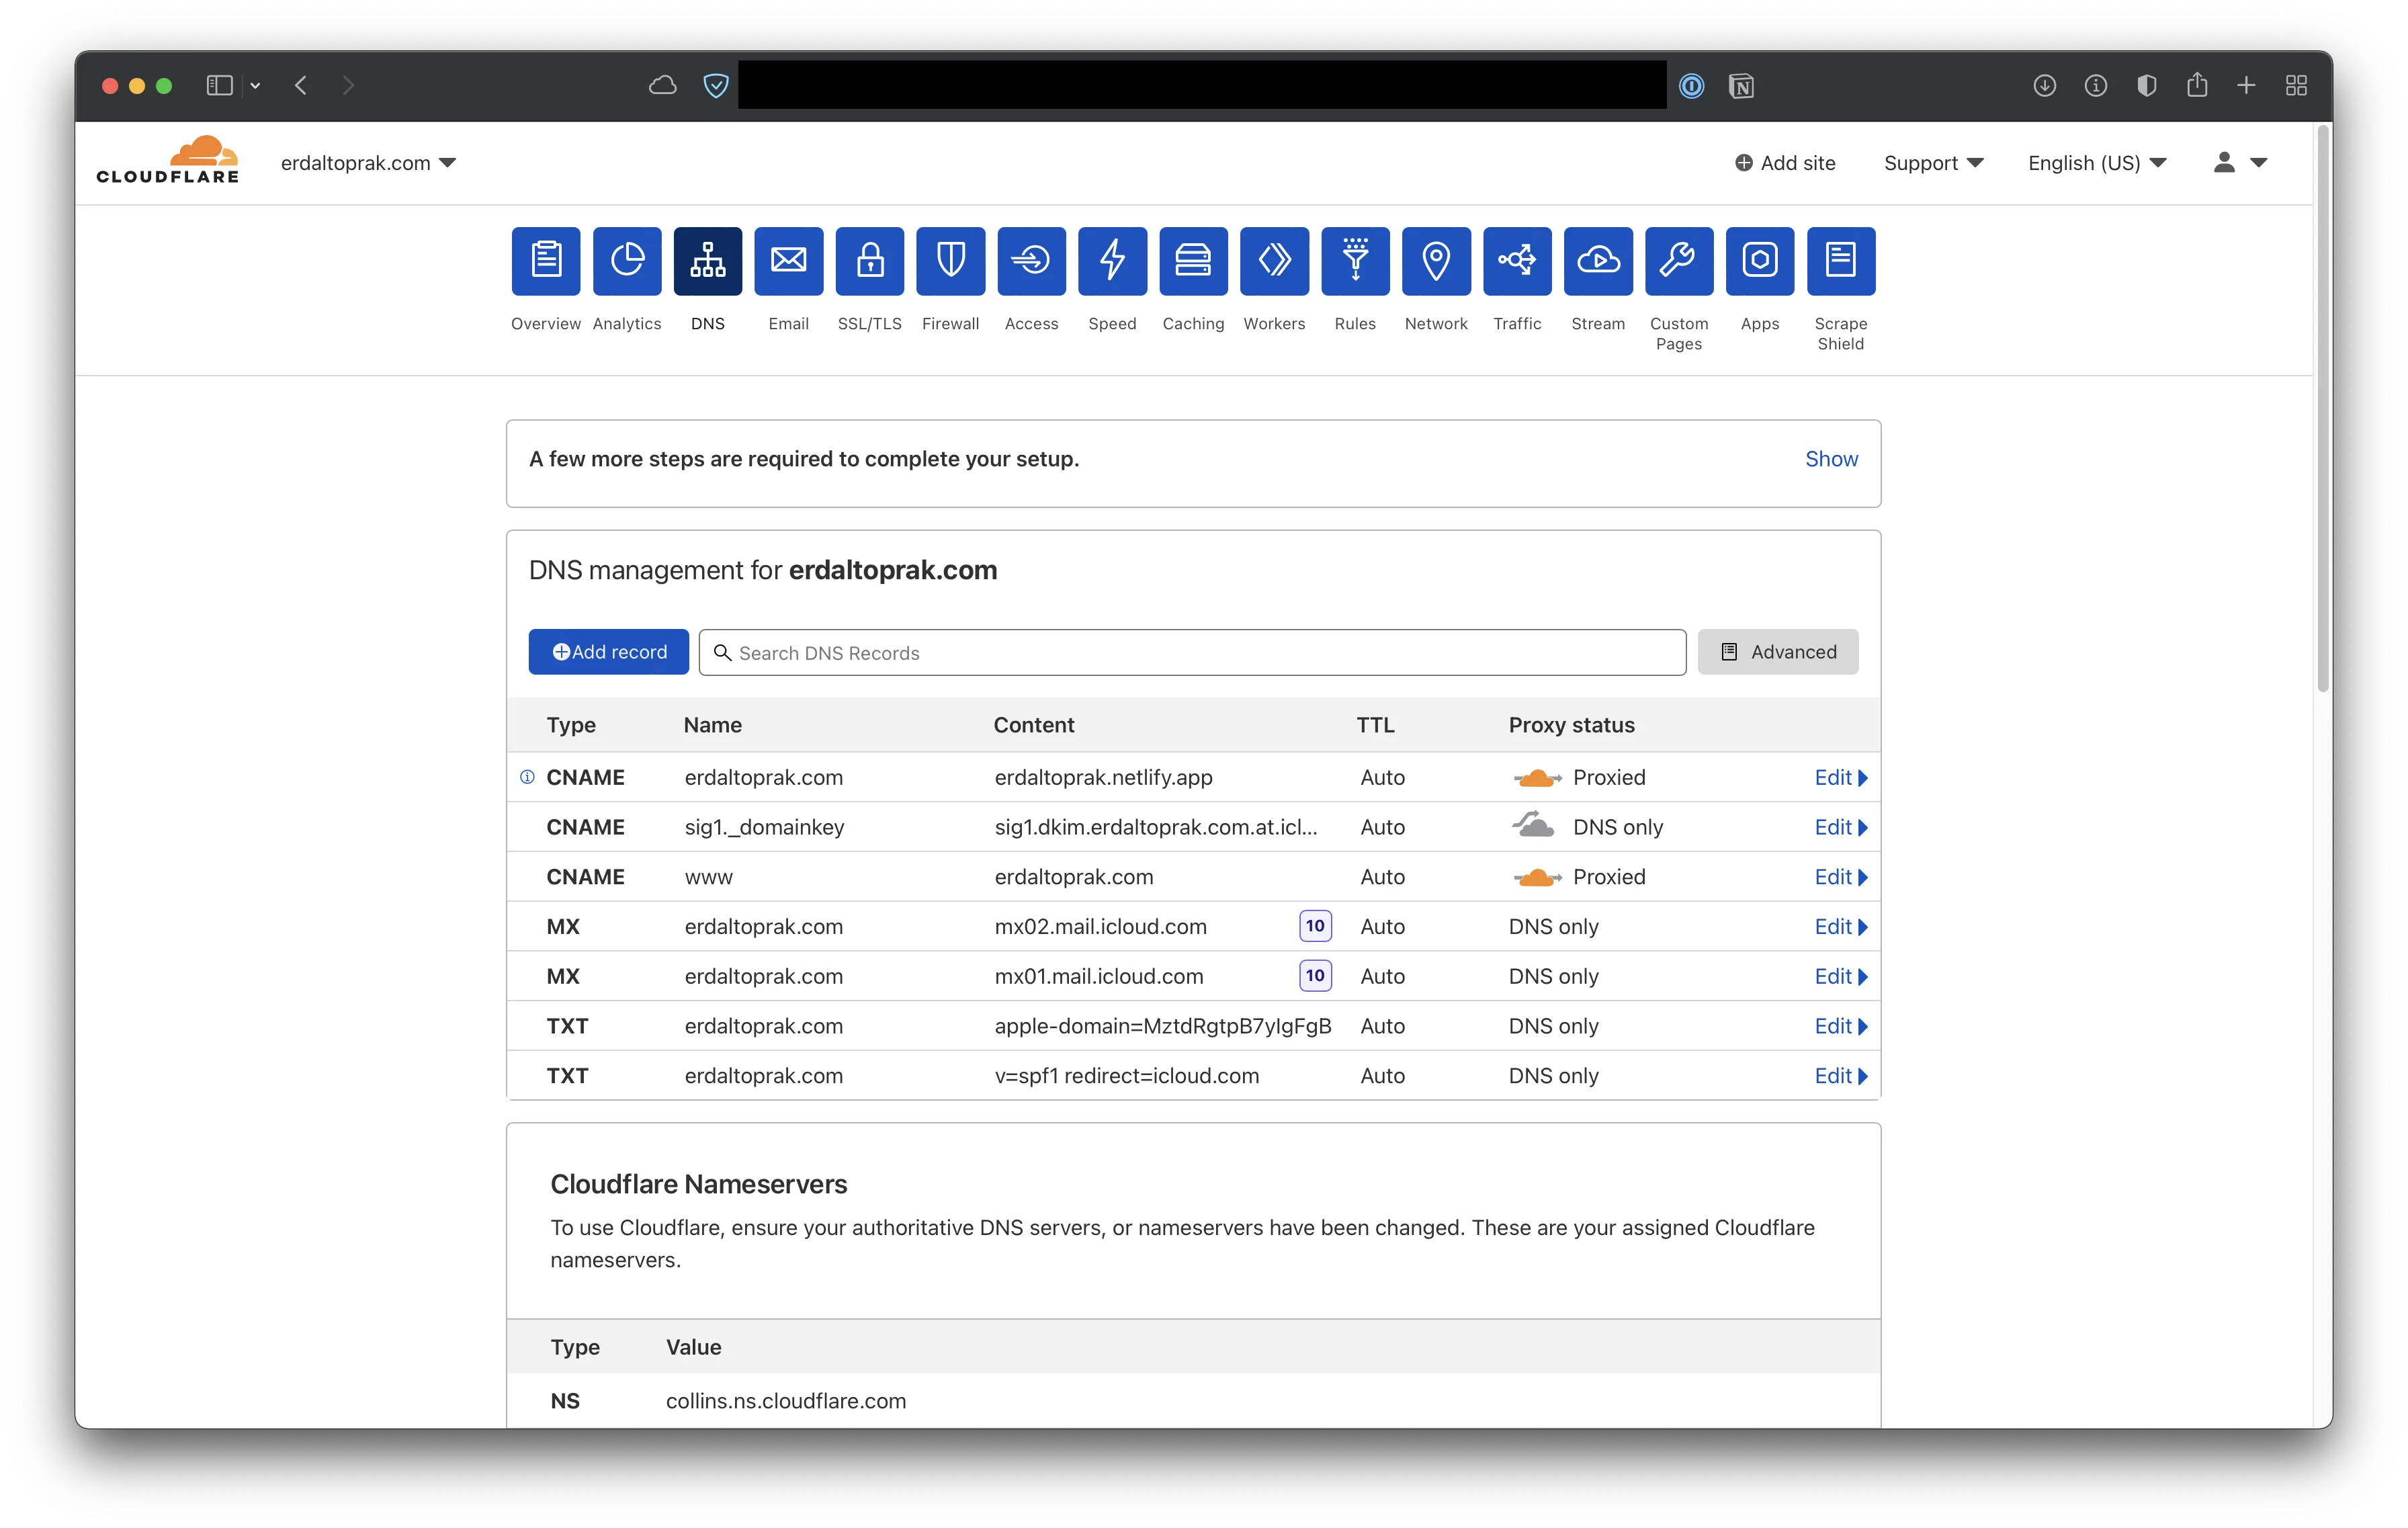
On the third step you will have unique instructions, so please use the image as a visual guide for how things should look like. Please note that for Cloudflare users that I advise to not proxy the given CNAME.
Congratulations, once you give the DNS some time to propagate you are all done! You can now set your default address, add addresses to iMessage or Facetime and send & receive emails from iCloud.